Timeline Properties
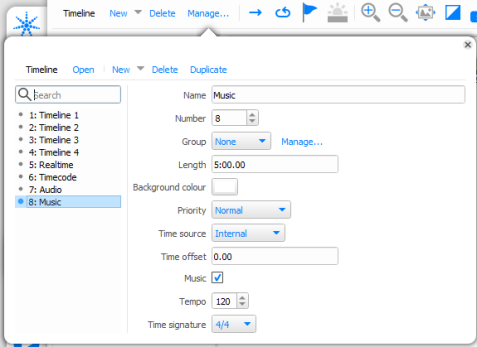
To change to properties of a timeline, select Manage... from the Timeline Toolbar. The dialog shown below will appear and you will be able to change the properties for the selected timeline/s.
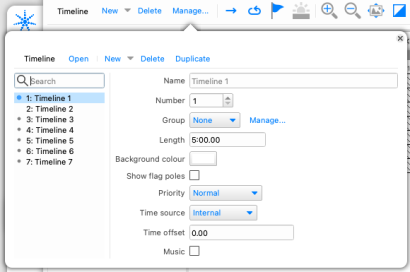
Name
Give your timeline a name here, a descriptive name will help you identify the correct timeline when creating triggers and viewing the web interface's status and control pages.
Number
Every timeline has a unique number which is primarily for reference but can be changed if necessary. The timeline number is used to identify a timeline for creating triggers, for example when using LUA scripts, and when using the web interface's command line.
Group
The Group dropdown can be used to assign a timeline to a playback group. Clicking ‘Manage...’ opens a new popover where playback groups can be added, renamed, renumbered or deleted. Numbers and names must be unique. The number of playback groups is limited to 100.
See Actions for more information.
Length
The default timeline length is 05:00.00 (5 minutes) and you will need to increase this before placing or extending presets beyond this time. The maximum timeline length is 24 hours to prevent them becoming unmanageable - use triggers to stitch together multiple timelines to create longer time frames.
Background colour
Select the background colour of the timeline. Setting this to a colour that is not used within the timeline will make it easier to see some presets, e.g. a 255 intensity preset won't show up very well if the background colour is white.
Show flag poles
Option to show long vertical poles below timeline flags. Helpful for aligning programming to flags.
Priority
Use the pull-down to select a priority level for the timeline. There are 5 priority levels which each feature an LTP+ timeline stack:
- High - the High Priority stack always plays above other timeline stacks
- Above normal
- Normal - the default priority
- Below normal
- Low - the Low Priority stack always plays below other timeline stacks
Time source
Use the pull-down to select a time source for the timeline to follow:
- Internal - the timeline will run autonomously although playback speed and position can be overridden using triggers.
- Real Time - the timeline will follow real time (see below)
- Timecode Bus - the timeline will follow one of the Timecode Buses (see below).
- Audio Bus - the timeline will follow one of four Audio Buses (see below).
Music
Enable tools for programming to music on the timeline. See Working with Music for more information.
Working with Real Time
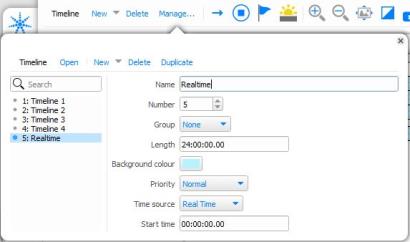
When a timeline's time source is set to Real Time, it will always line up its position with the time according to the controller.
This means that timelines can be created that will always play the same effect at the same time every day.
Timelines can be up to 24 hours long, but they can be any length less than that. If the timeline isn't 24 hours long, then a Start Time can be set to define when in the day these effects should be run.
Setting a timeline's time source to Real Time allows you to use waypoints on that timeline.
NOTE: When Simulating timelines, the playback rate can be increased to 60x normal speed to accommodate long Real Time timelines
Working with Timecode
By selecting one of the Timecode Buses, the timeline's time bar will display timecode values and the properties pane will give further options:
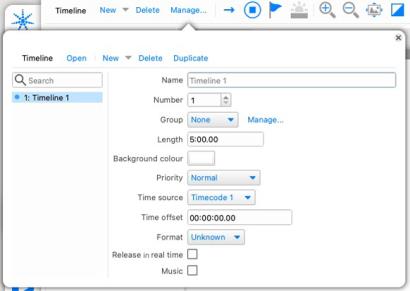
Time Offset
Timelines by default start at 00:00:00.00 (hours:minutes:seconds.frames) but the timecode source may not do so, the tape may have been "striped" with an offset of an hour (01:00:00.00) for example. Enter the source's starting value in this box to synchronise.
Format
Timecode comes in four formats that depend on the source media used, select the appropriate format here (Film24, EBU25, SMPTE30 & NTSC30) to prevent missed frames and stuttering playback.
Release in real time
When selected, the timeline will follow the real time clock when releasing rather than following the timecode source.
Timecode Buses
Timecode Buses are internal buses to which one patches the external timecode sources available to the system. These may be MIDI timecode (MTC) sources input via one or more LPCs'

Working with Audio
By selecting one of the four Audio Buses, the properties pane will give further options:
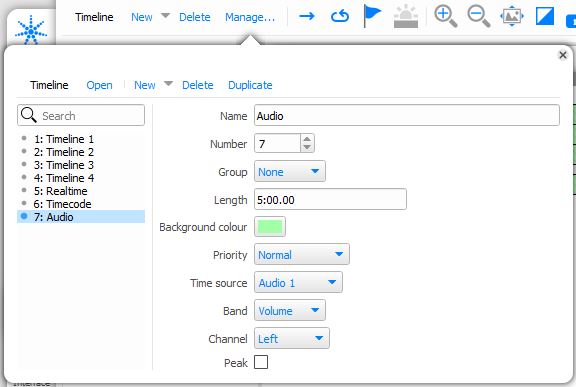
Band
The RIO A can generate up to 30 frequency bands (configured in Remote Device properties). Use this pull-down to select which band will drive the timeline.
Audio Buses
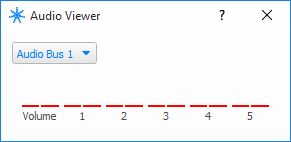
The four Audio Buses are internal buses to which one patches the external audio sources available to the system via one or more RIO As. You can use the Audio Feedback window available from the Main menu to monitor each Audio Bus:
Working with Music
By selecting Music, the properties pane will give further options:
Tempo
Specify the number of beats per minute (BPM) on the timeline
Time signature
Specify the number of beats per bar
-
None – use a sequence of beats with no bars
-
3/4
-
4/4
-
5/4
-
6/8
-
7/8
-
12/8
Timelines with music tools enabled show bars and beats in the timeline header. The cursor snaps to musical divisions when moving and adjusting presets. Simulation audio will automatically be enabled.
With music tools enabled, preset timing can be set in musical terms. These use the format Bars | Beats . PercentOfBeat and can be typed using just full stops. For example, entering a preset length of 4.2.5 will set the length to four bars, two and a half beats. Music timelines start at time 1 | 1.00.
The metronome button in the timeline toolbar can be used to activate a metronome click track which plays through simulation audio. The metronome will not be audible on controller output.
Designer can analyse music and detect a tempo. Right-click on any audio track and choose ‘Get tempo’. The tempo of the current timeline will be updated with the detected tempo. Designer may occasionally detect a tempo which is half or two times the correct tempo. If you suspect this has happened, tempo can be manually adjusted from the timeline's properties pane.
Changing the Timeline and Preset Defaults
Use Main Menu > Preferences on the main toolbar and select the Timelines tab to change these defaults. Here you can change the default background colour, timeline length and fade & release time of newly placed presets. See Preferences.